
After finishing a large custom cat wall for a customer, We wanted to write a short breakdown of our process of making a customized setup.
We start the process by talking to the customer and getting a feel for what their needs and goals for the project are. Initially we gather as much info on the space that will be catified to make sure the first drafts are as close to the customer's specification as possible. During this process we collect important info such as dimensions of the room, photos, planned budget, preferred items, and number, size and age of cats that will be using it.

Room photo from customer - a huge blank canvas to work with
Photos help greatly in recreating the space in a 3D model and make the preview results much closer to the final version. The 3D renders bring the preview to life and customers can see a very realistic preview of their space after the installation is complete. This also makes any further adjustments much easier and ensure that we get the optimal layout which is approved by the customer.
The number of cats using the space plays a great factor in the layout and affects the number of beds and access routes for the elements. Age, size and weight are also important as we optimize the layout to match the cats’ needs. This means that we can use different elements like BigCat elements for larger or more active cats and make layout adjustments like smaller gaps between elements for older or less mobile cats.
A great deal of time goes into preparation of every major project, but it takes out most of the guesswork from the process so we can ensure optimal layout and great results.

3D Render of the layout we were all happy with
Based on customer photos and measurement we created a 3D model of the room and started working on the layout. In this case, the setup was intended for medium sized cats without any known disabilities so we went with standard Wally items combined with Chonk Posts and standard edge-to-edge gap length of about 35-40cm (14"-16").
We carpeted all the items for extra grip due to the height and went with BigCat beds at the far edges to make best use of the huge windows and natural light at the edges of the layout. Making a meaningful layout for such a huge wall and keeping everything in budget was a challenge but in the end both we and our customer were happy with the layout while (almost) keeping within the target budget.

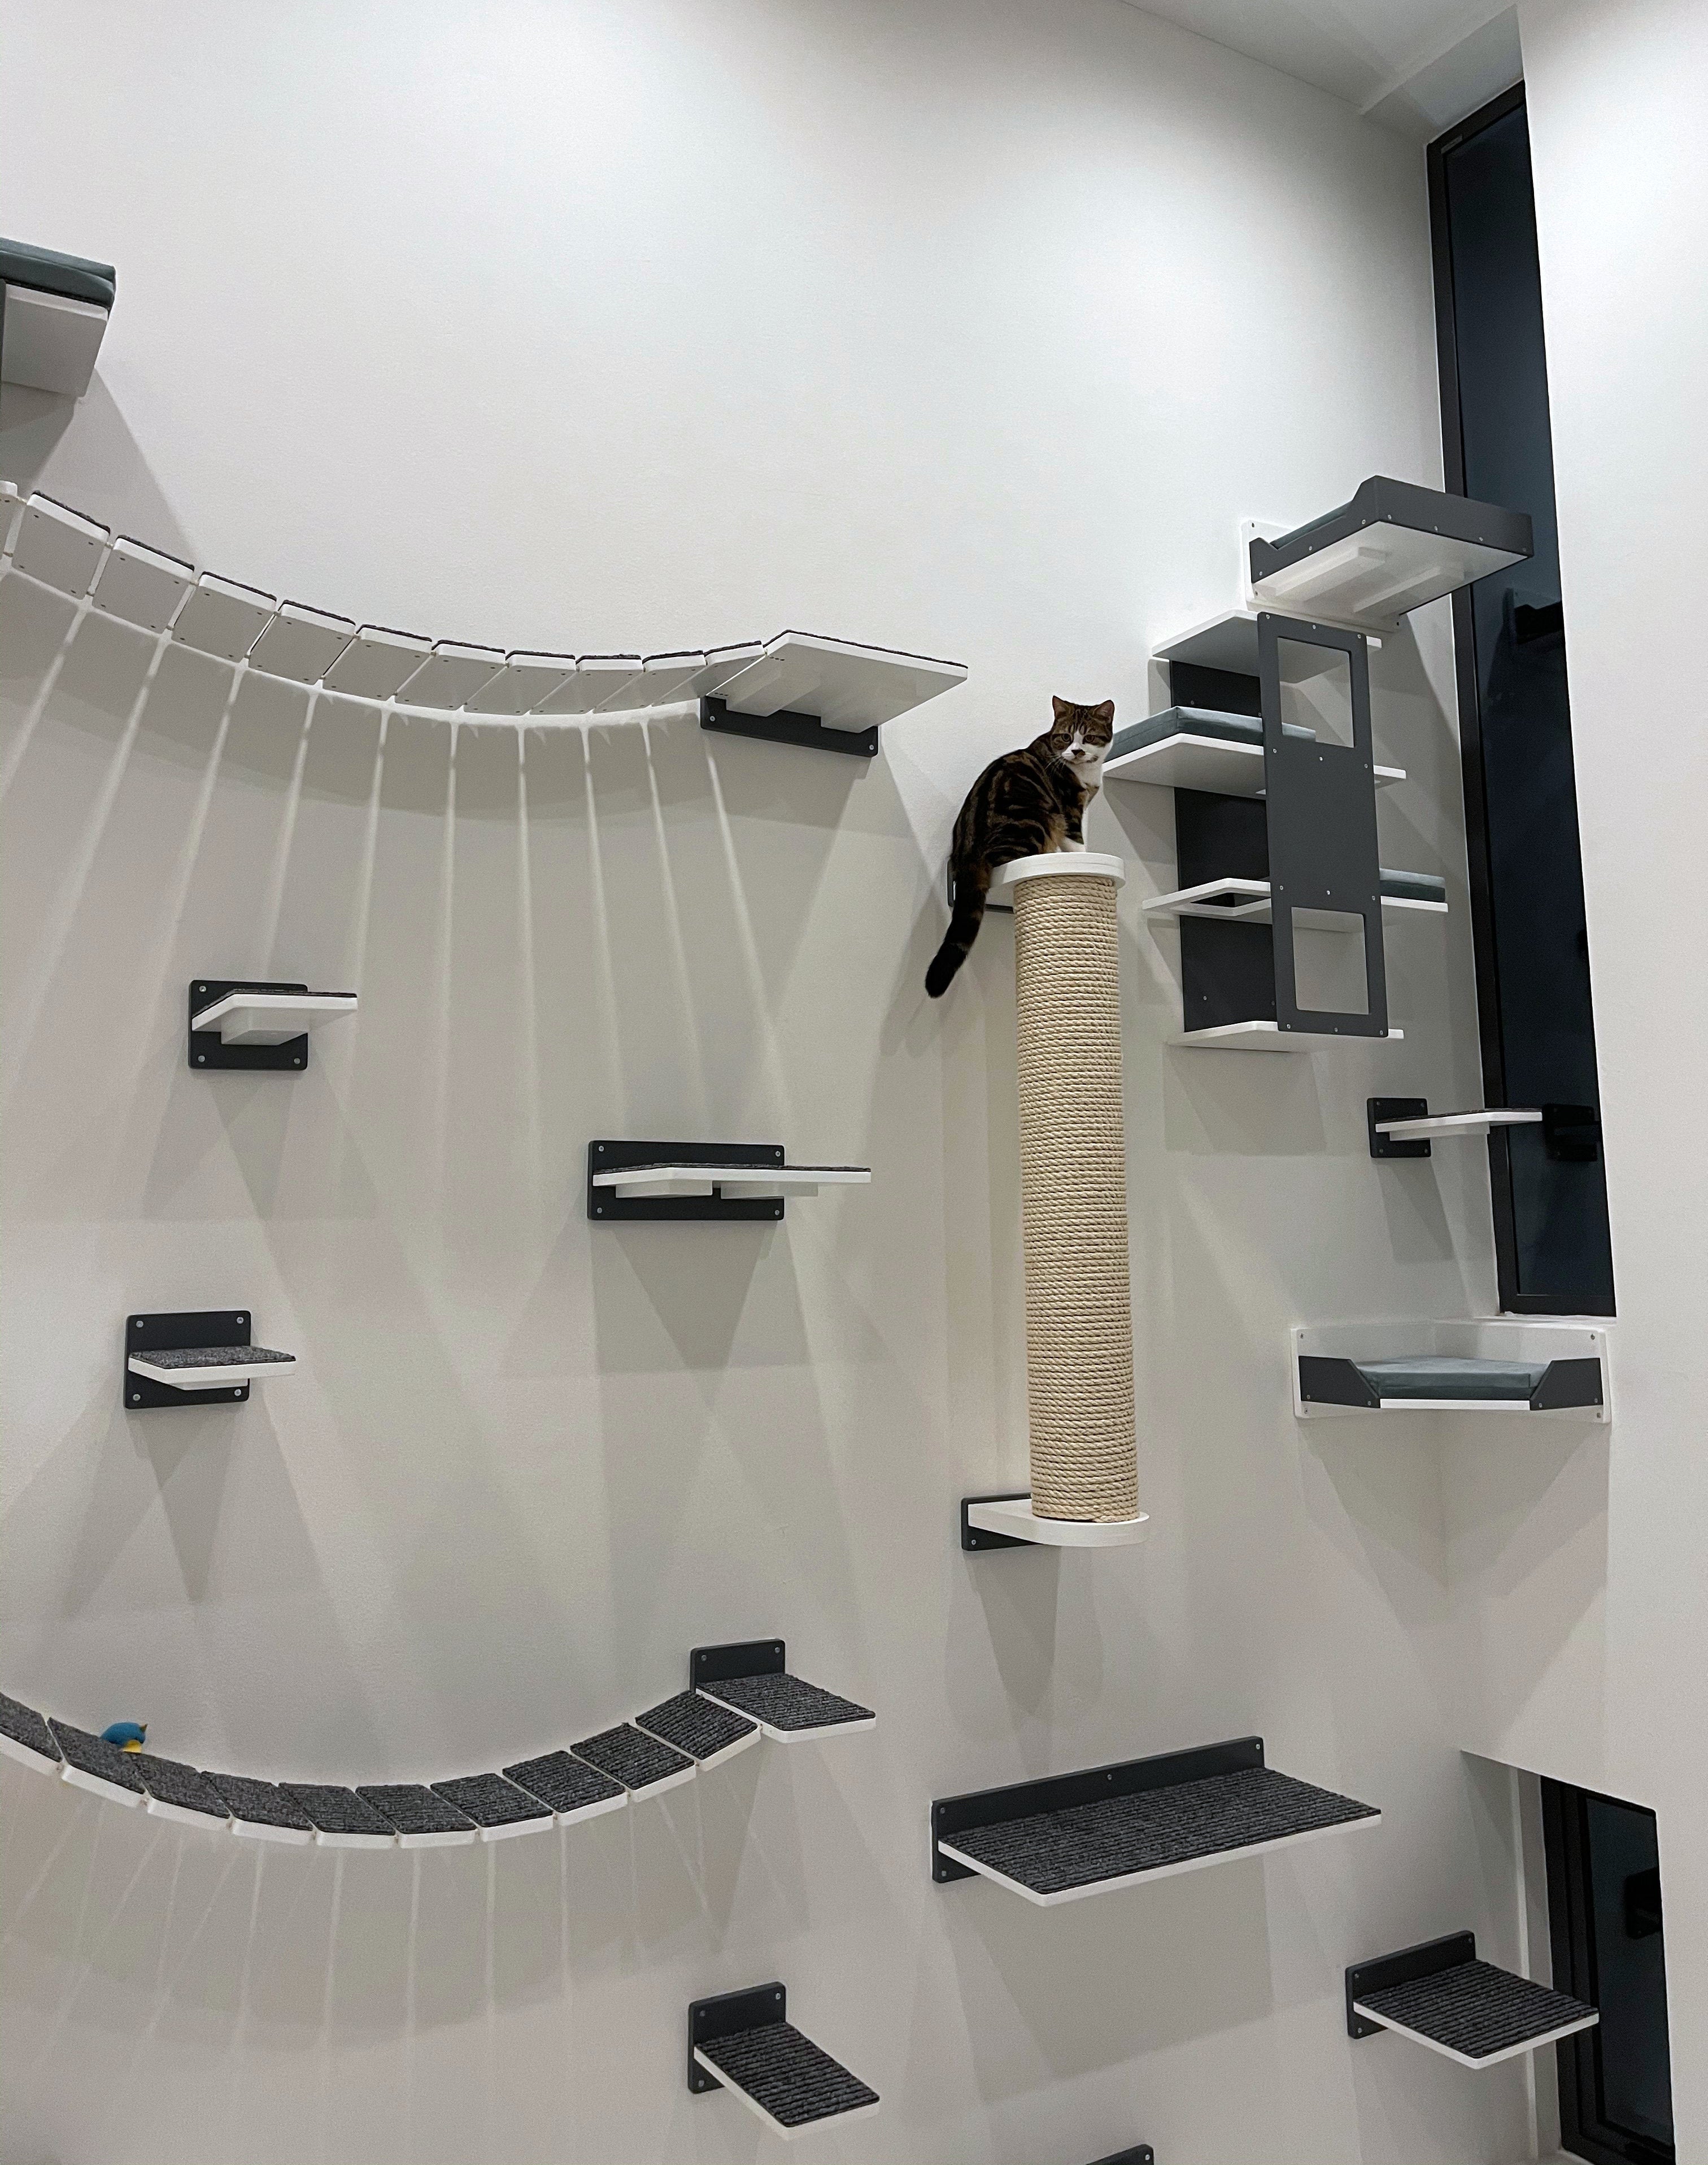
Installation complete
Shipping such a large order from Croatia to the the other side of the world has been a complex and costly endeavor but all the boxes made it safely and everything was ready for installation. The customer went with a slightly darker grey than in the render but the final layout was nearly identical to the previews.

Testing and Approval process - First contact

Testing and Approval process - I think I could get used to this
Testing and Approval process - I think this will work nicely :)
We would like to thank our happy customer once again for this great opportunity and the photos of the completed setup. It was an interesting project and working with such a huge wall had its challenges so we hope that the kitties will like the outcome as much as we do.


